
How to Blur Background in Lightroom (3 Different Methods) Pretty Presets for Lightroom
Step One: Import Your Image: To import your image, open up Lightroom and click "Import" on the bottom left. From here, the easiest way to upload the image is to simply drag and drop the file into the center of the screen. Click "Import"—it's on the bottom right this time, just to be tricky. Now that you've imported the image you.
How to Blur Background in Lightroom in 6 Easy Steps + Bonus Freebies
Suggested Read: 7 Tips For Selecting The Perfect Background. 1. Import Your Photo Into Lightroom And Prepare The Image. Because this process requires specific areas of the photo to be worked on that change from one to the next, background blur in Lightroom must be applied to individual photos.

Cara Mengedit Foto Blur Di Lightroom Belajar Edit
Using Lightroom is a good choice for fixing blurry images. In this section, you will learn how to unblur an image in Lightroom easily. Have a look below to discover its procedure: Step 1 Import your image. You can use the basic and detail panel of Lightroom to fix your blurry images. For this, import your image in Lightroom and go to the right.
Cara Mudah Mengedit Foto Di Lightroom Belajar Edit
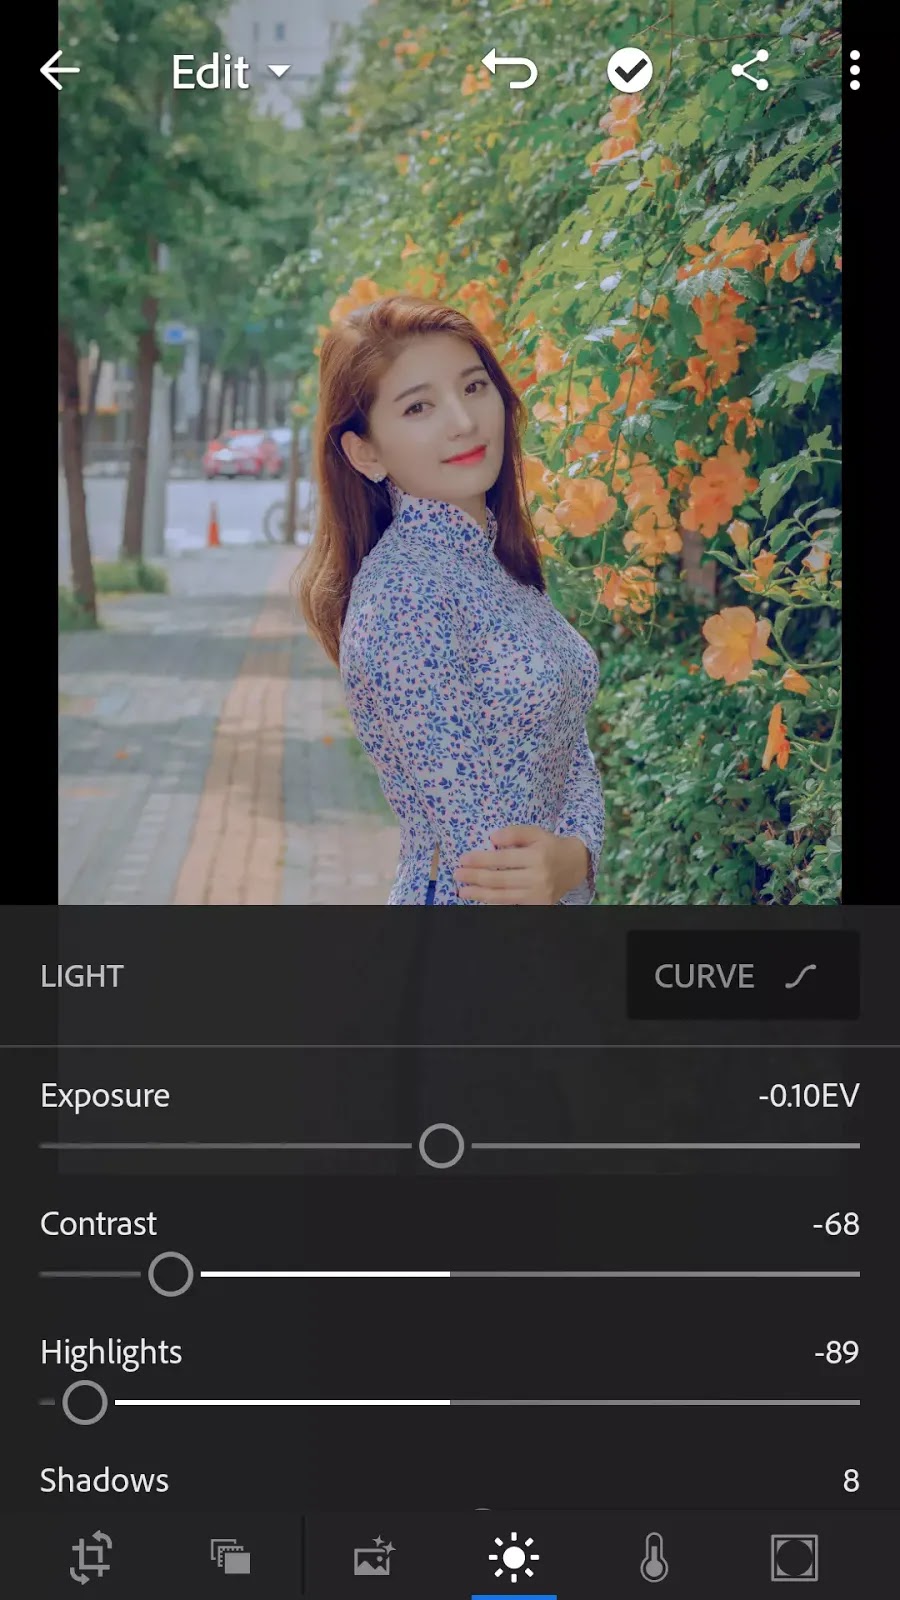
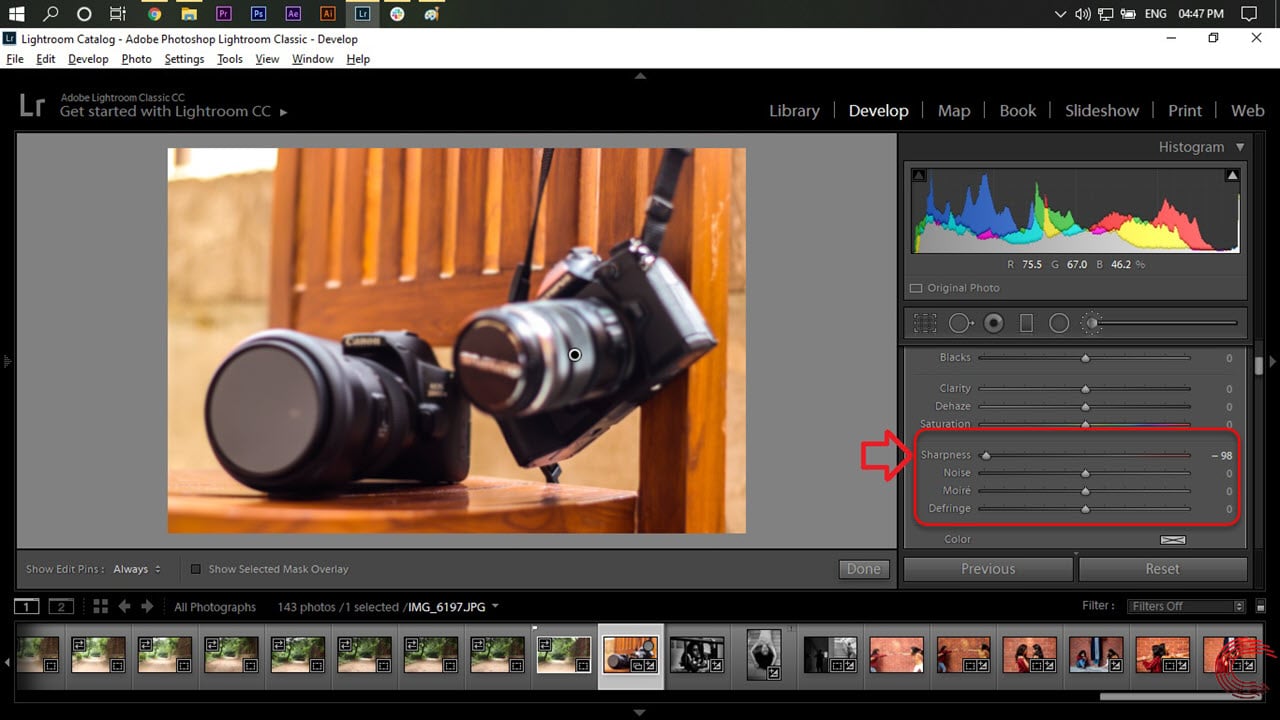
Here's how to blur the background with the help of a graduated filter: Launch the Lightroom app. Select the photo you want to edit. Select the graduated filter from the menu. Position the filter so that it covers the part that needs to be blurred. Tap on the Detail section at the bottom. Decrease the sharpness to -100.

Lightroom Tutorial How to Blur Backgrounds in Lightroom
Tutorial mempertajam foto di adobe lightroom.dengan menggunakan fitur sharpning di adobe lightroom kita bisa dengan mudah mempertajam foto.Follow me on Sosme.
Cara Blur Di Lightroom Android Terbaru
⚡ Learn CHATGPT with our NEW course: https://www.videoschool.com/YT1 Learn how to add blur to your photos in Lightroom. This is a great way to blur out your.
How to Blur a Background in Lightroom (Step by Step Guide) Design Shack
cara memberi efek blur di lightroom hp - BokehJANGAN LUPA LIKE, SHARE, COMENT & SUBSCRIBETutorial edit video tiktok viral dj siul sesuai beat lagu | Tutorial.

Details 100 how to blur background in lightroom Abzlocal.mx
Dalam panduan singkat ini, kami akan menunjukkan kepada Anda cara mengaburkan latar belakang di Lightroom untuk menciptakan kembali efek yang sama di foto potret Anda sendiri. Mari kita mulai! 2 Juta+ Preset Lightroom, Add-On, Tindakan + Lainnya. Akhirnya, kurangi Ketajaman untuk membuat efek blur. 5 Preset Pengeditan Potret Lightroom yang.

Cara Blur Di Lightroom Android Terbaru
Lightroom Background Blur: Brushes. Step 1: Import your photo. Step 2: Grab the Adjustment Brush tool. Step 3: Customize the Adjustment Brush. Step 4: Paint the background. Step 5: Fine-tune the selection (optional) Step 6: Blur the background. 2. Lightroom Background Blur: Radial Filters.

How to Blur Background in Lightroom (3 BEST ways!)
Cara Memburamkan Latar Belakang di Lightroom. Sebagai Associate Amazon, kami memperoleh penghasilan dari pembelian yang memenuhi syarat. Terkadang, latar belakang suatu gambar mengalihkan perhatian saya dari subjek. Memburamkan latar belakang Anda sedikit sehingga tidak setajam subjeknya dapat membuat subjek Anda menonjol.

How to Blur Background in Lightroom (3 Different Methods) Pretty Presets for Lightroom
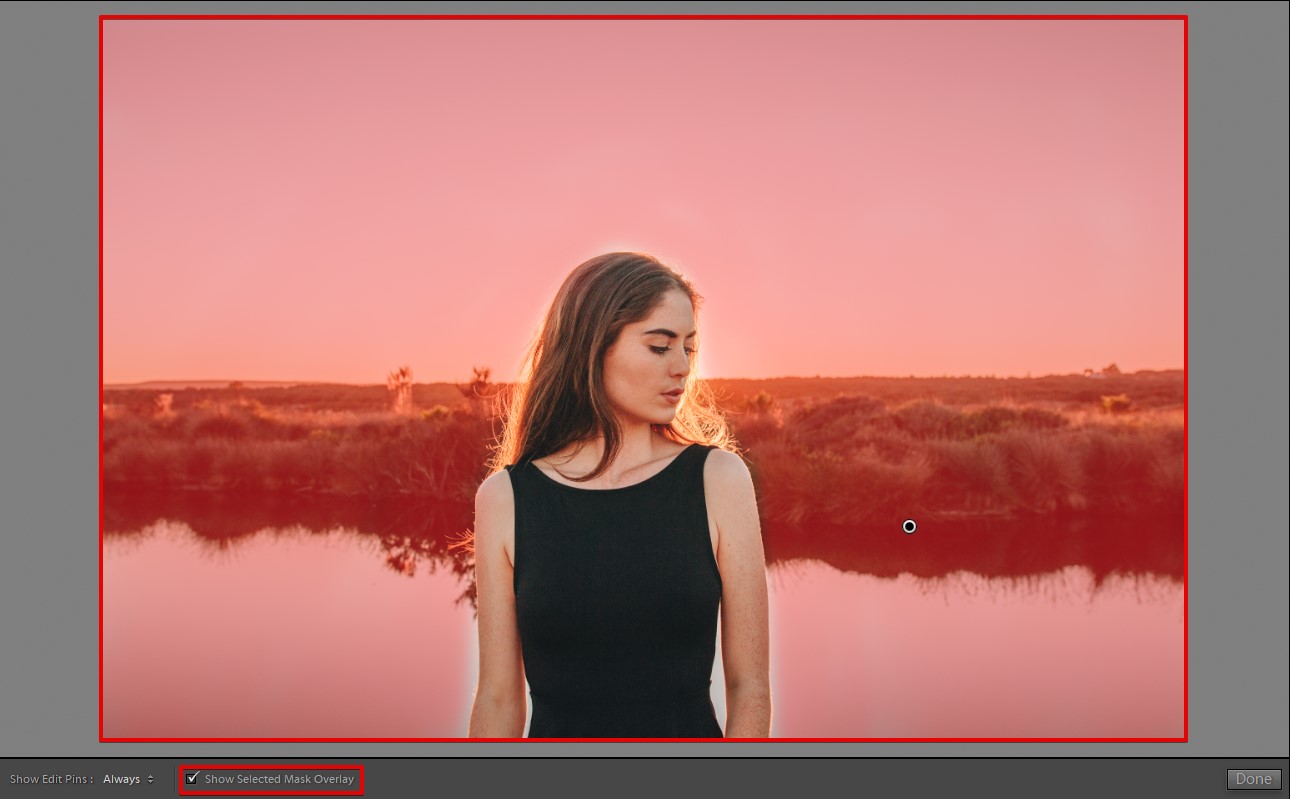
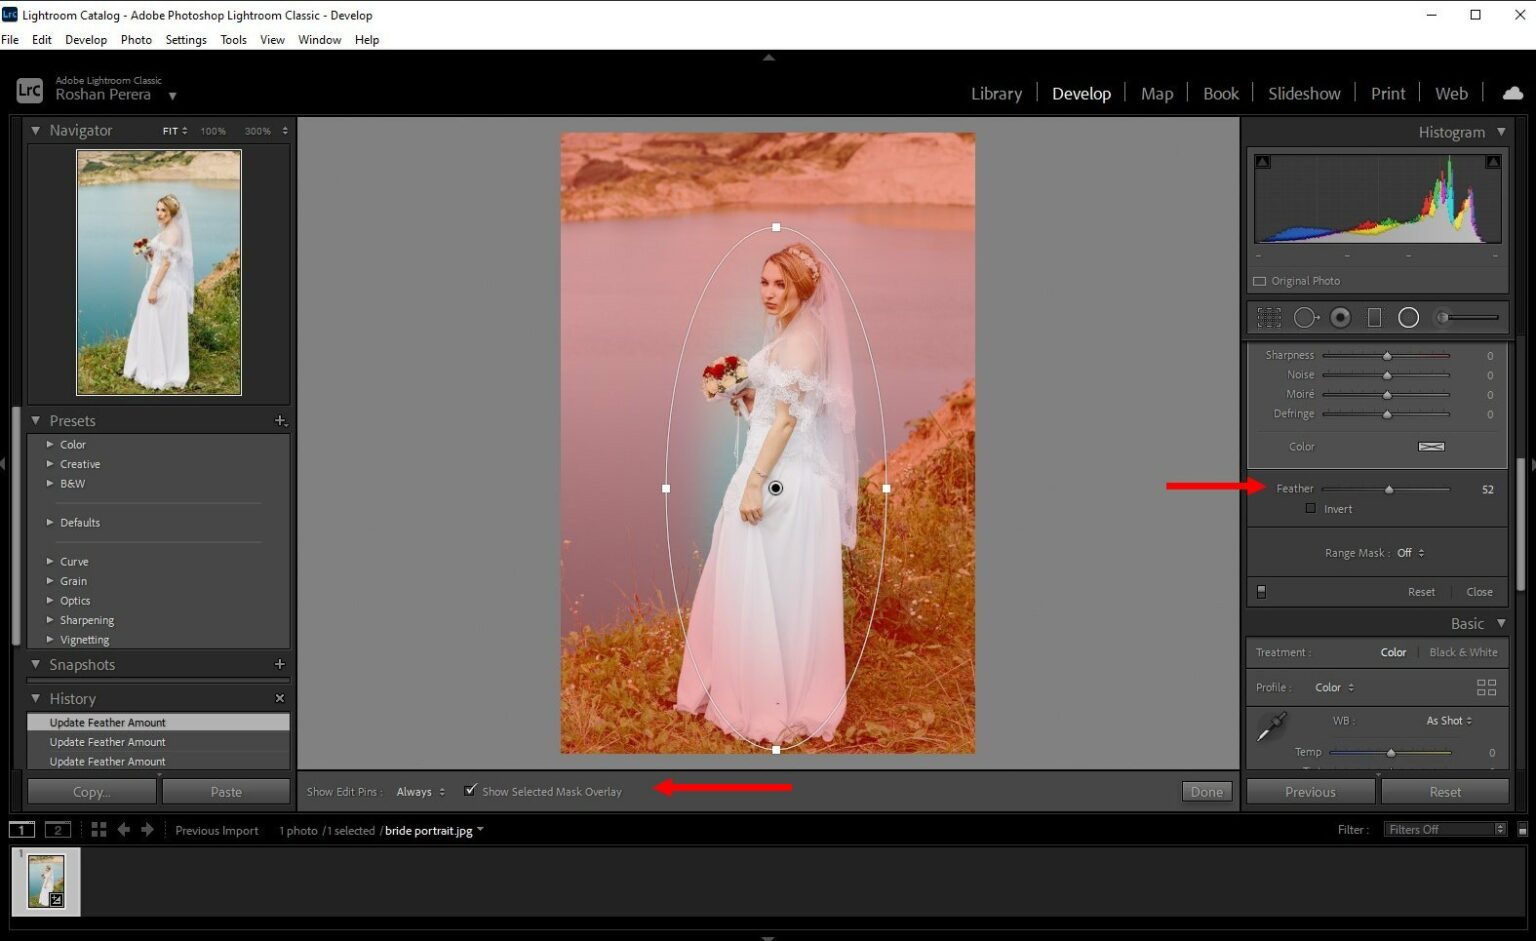
First, open your photo in Lightroom and switch over to the Develop Module. Then select the Radial Filter tool. Now create a Radial Filter around the person or object in the photo. Tick the " Show Selected Mask Overlay " box to see the selection. Once you create a Radial Filter, everything outside the selected area is affected by any of the.
How to Blur a Background in Lightroom (Step by Step Guide) Design Shack
Step 3. Adjust Feather & Flow. Use the feather and flow sliders to adjust how strong you want the effect to be. Step 4. Brush on the Blur. Using the brush tool, "paint" the blur effect on your image wherever you like. ( TIP: Hit the 'O' key to see a colored overlay of where the effect is being applied.

5 Cara Mengedit Foto di Lightroom Ala Selebgram Asalkata
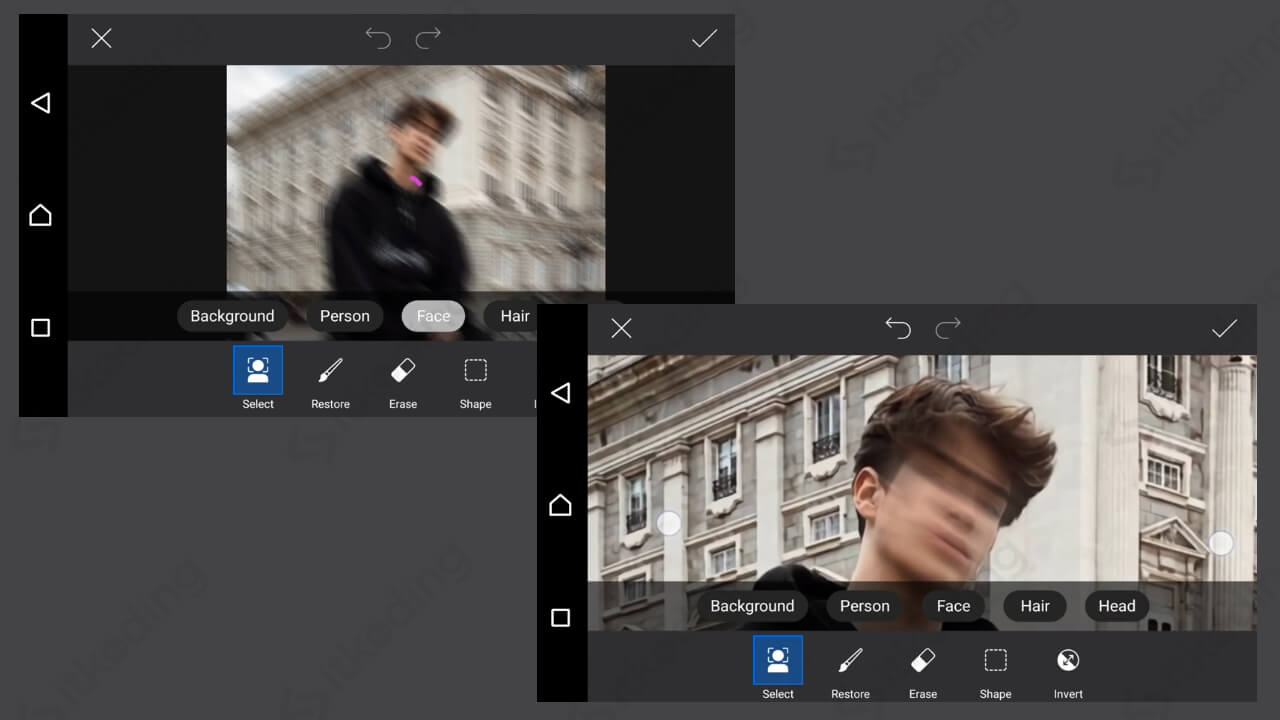
In this Lightroom tutorial, you'll learn how to use several masking tools together to create a realistic selection of backgrounds and apply a blur to it with.

Cara Mengedit Foto Blur Di Lightroom Belajar Edit
2. Use Lens Blur to Add a Blur Effect to the Background Adobe added Lens Blur to Lightroom in 2023, and it's an excellent way to blur the background of your pictures in the app. Besides automatically adding blur to your photos, you can use Lens Blur to create your own bokeh effects and more. To use Lens Blur in Lightroom, follow these steps:

How to Blur Background in Lightroom (3 BEST ways!)
The new Lens Blur tool in Lightroom adds an aesthetic blur effect to any part of your photo. You can easily apply optical Blur and Bokeh adjustments through an interactive, customizable experience that lets you define the blur amount and refine focus. The AI-powered Lens Blur analyzes a photo through a depth map and creates a natural blur effect that is further customizable.
How To Blur Out In Lightroom Learn How To Blur The Background Quickly And Easily In Adobe
To do it you need about 5 minutes. 1. Import Your Image. To import your photo, start Lightroom, find "Import" in the left bottom part and click on it. The simplest way to import photos is to drag and drop them in the center of the working canvas. Check out how to get Lightroom for free. 2. Go to the Develop Module.